Overview
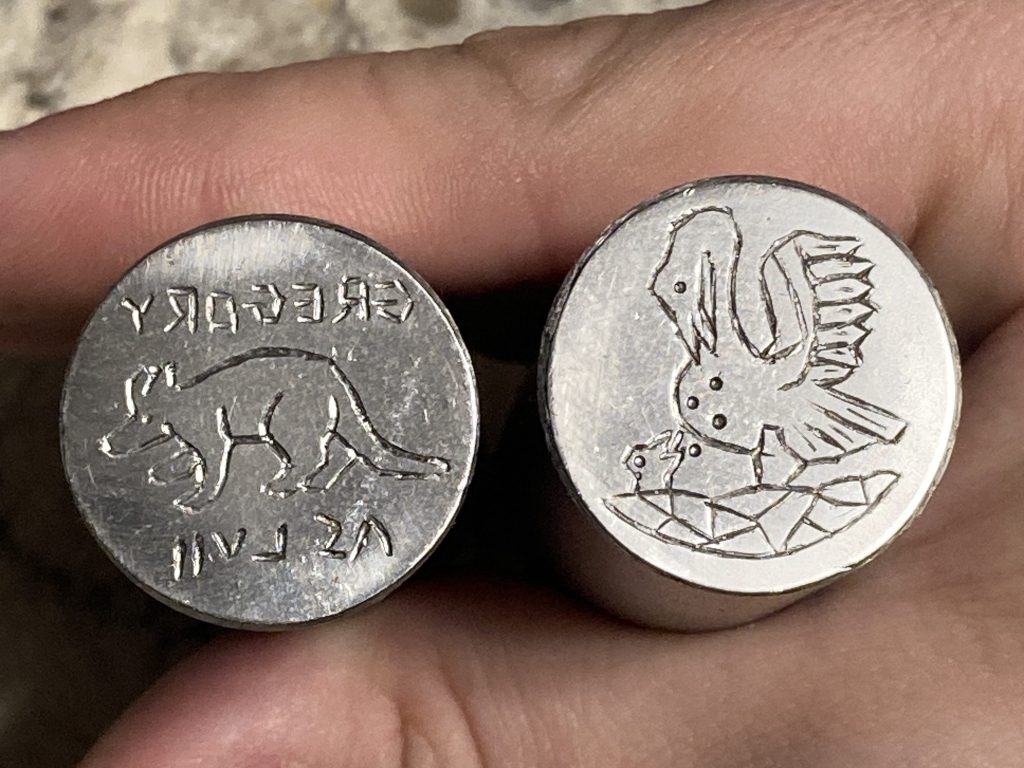
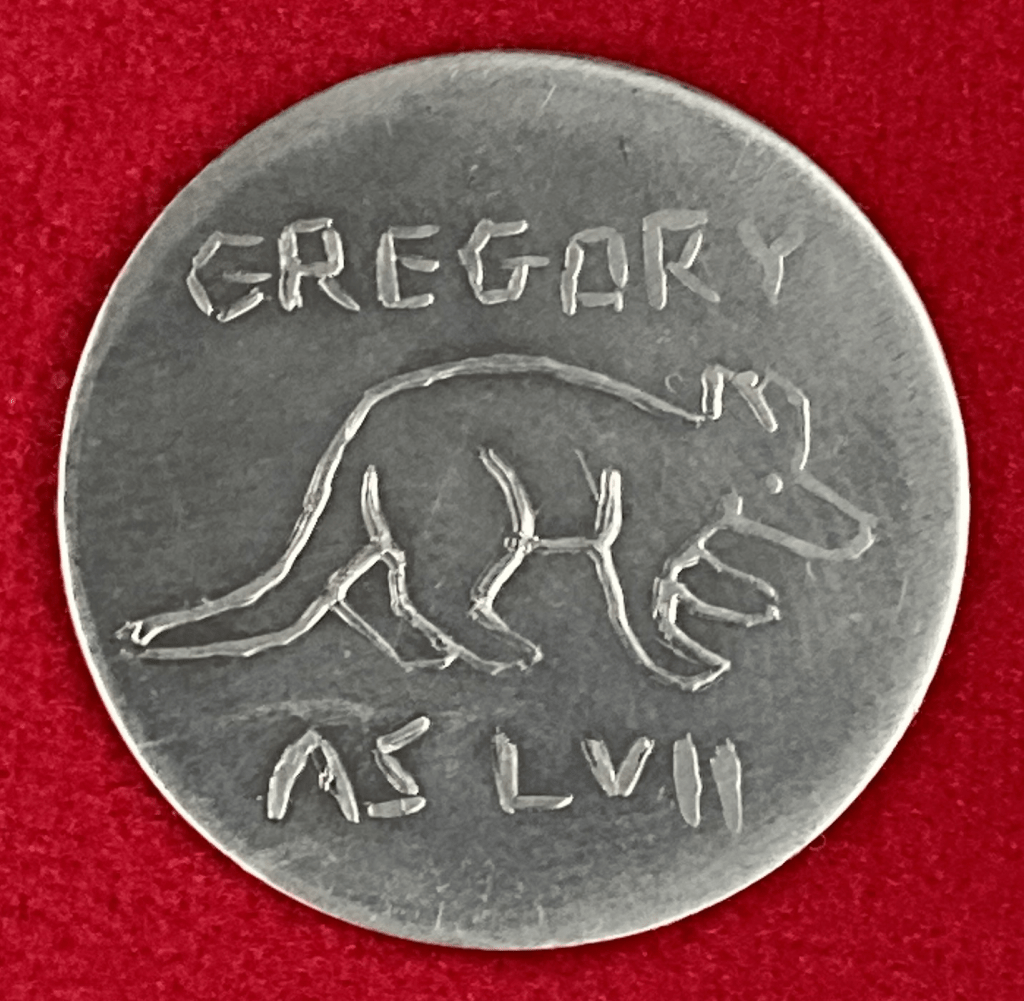
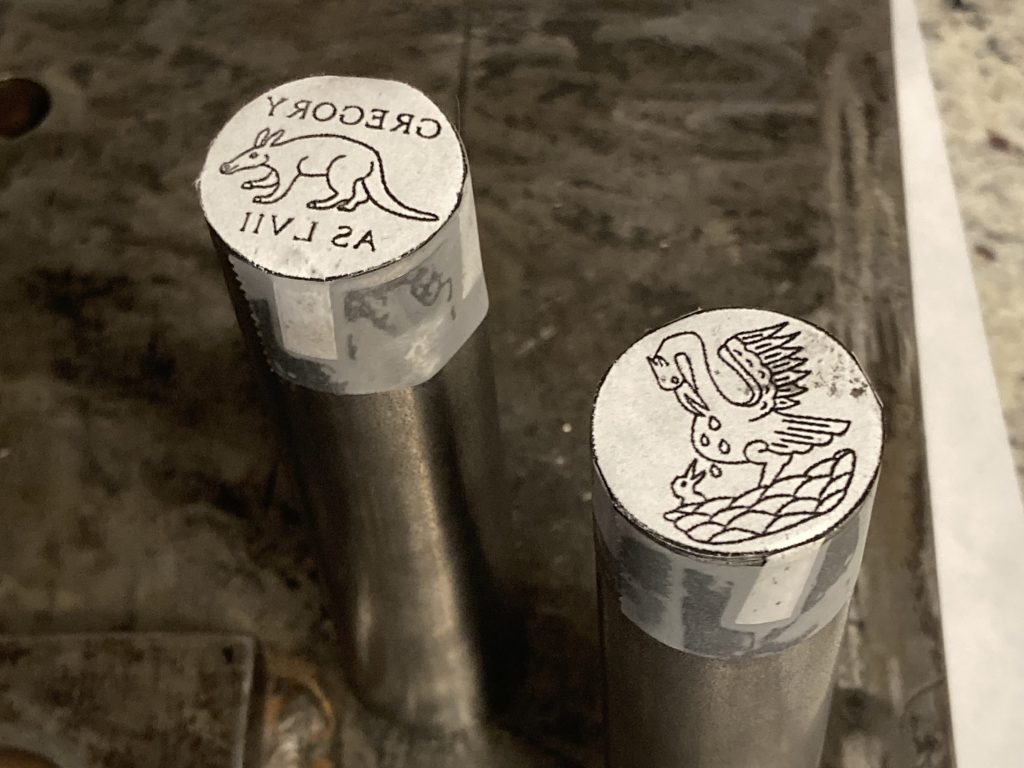
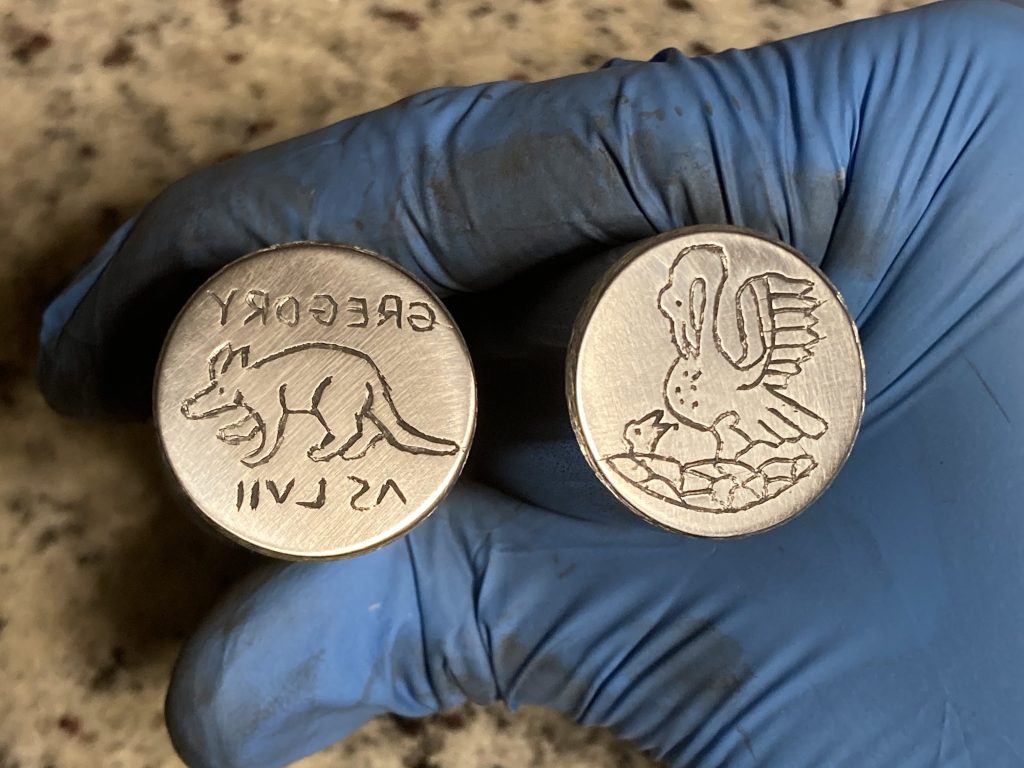
Obverse: “GREGORY”, “AS LVII”, a sinister aardvark passant
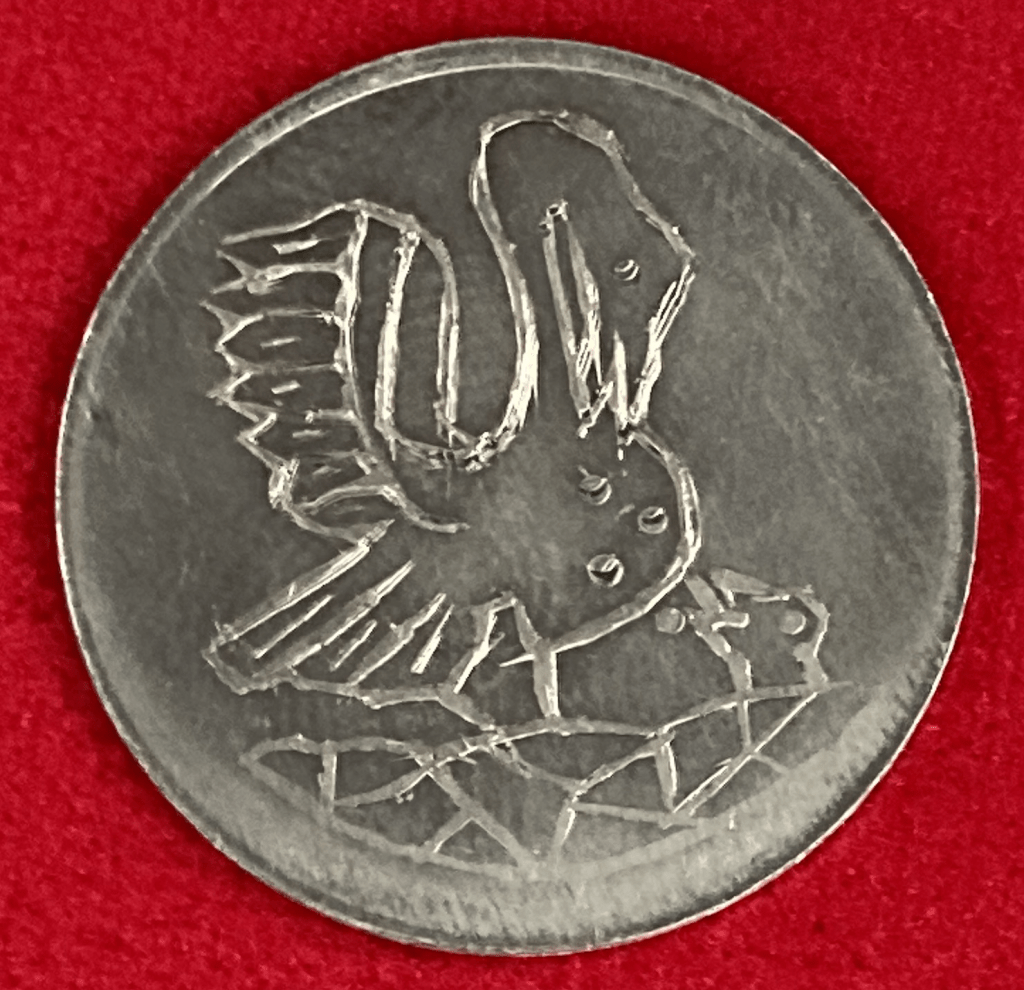
Reverse: A pelican in her piety
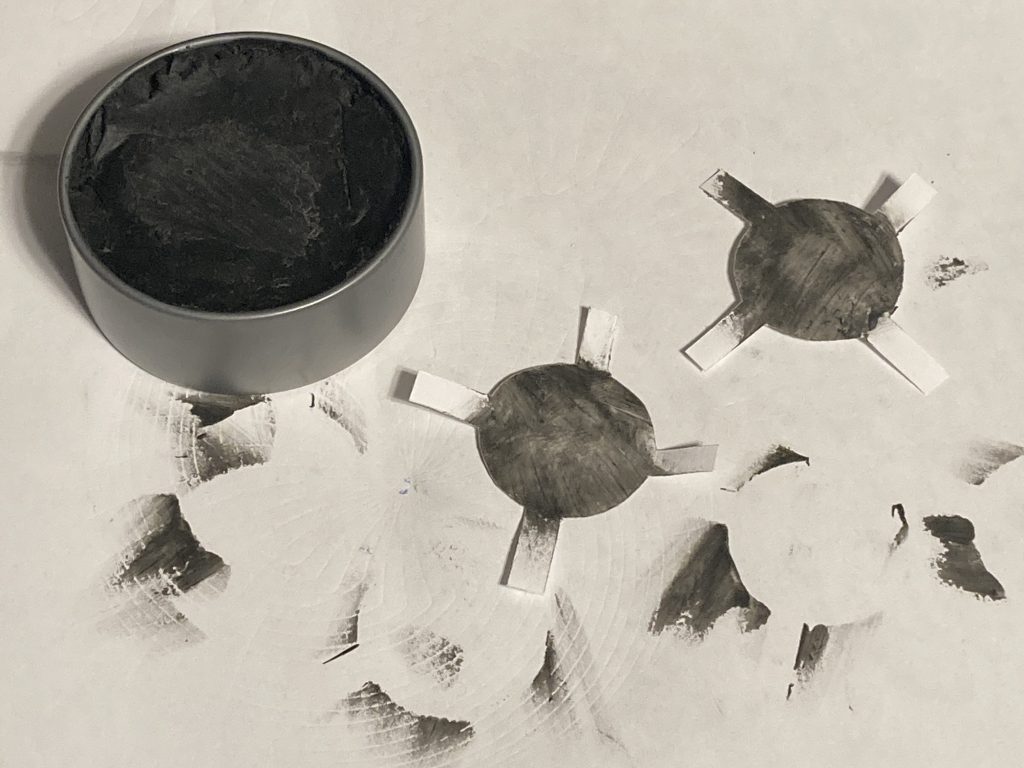
Medium: Pewter
Technique: Punchwork/Chasing; Engraving; Hammer-struck by hand
Completed: March 2024
Origin: Contemporary (SCA, peerage and personal heraldry)
Commissioned By: Gregory Bryant
Notes
This was my most complex die made to date, with two large animals and multiple lines of text. Due to my limited resources I carved the dies for a 1-inch coin on 1-inch blank, which I have since learned causes significant difficulty during the striking process.
A piece of advice to all moneyers: Your dies should be 25-50% wider than the actual size of your blanks, or you will have a very hard time getting a clean strike. I ended up having to melt down and reroll about half of the blanks I struck, because if the strike wasnt perfectly on center (which is VERY hard to do with the 8lb sledgehammer needed for large coins) about half of the design wouldn’t press correctly.
Process
When Gregory asked me to make his vigil tokens, his only request was they needed to have “A pelican and an aardvark.”
I went in knowing that these images were too complex for me to make with my punches at my current skill level, which meant that they would need to be engraved. I’d done a little engraving before but not for a coin, so I tried to keep the keep the designs relatively simple and straightforward. I went with a pelican on the back (which can be reused for future tokens), and the aardvark with the vigilant’s details on the front.
Paper copies of the designs were printed out (reversed for the dies) and my Homemade Engraving Transfer Wax was applied to the backs before taping down to the dies.
When the designs were traced over with a fine point, a thin wax outline was left on the surface of the dies.
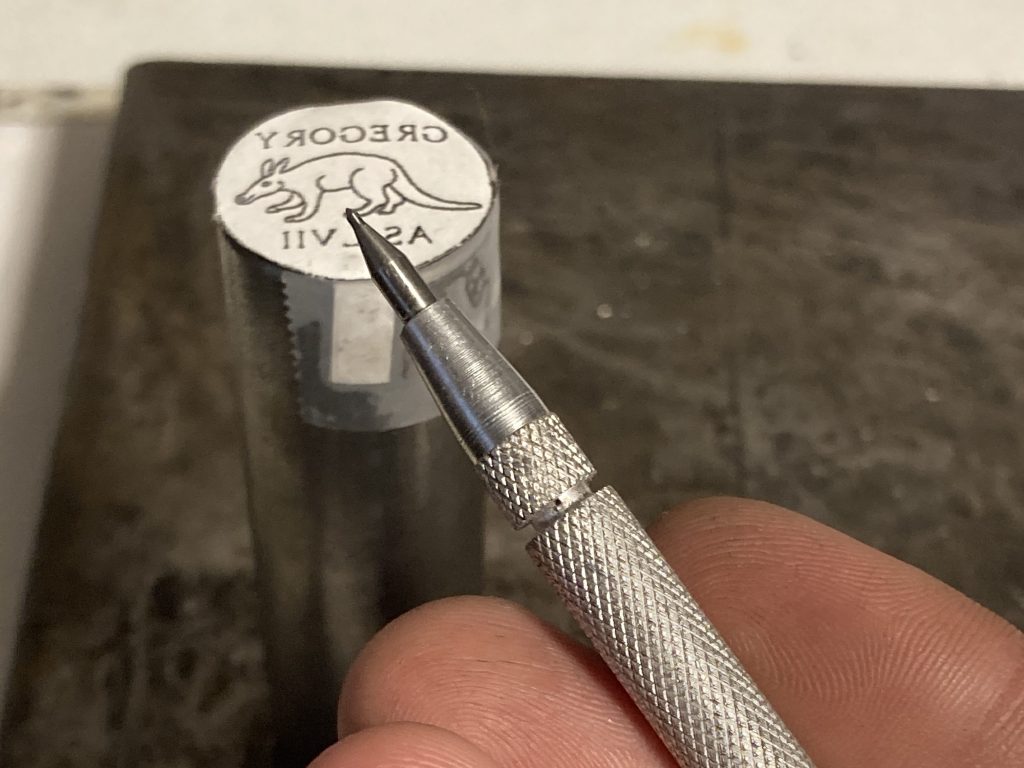

Before anything else, this outline was lightly scratched into the surface of the steel with a fine point, in order to create a permanent outline.
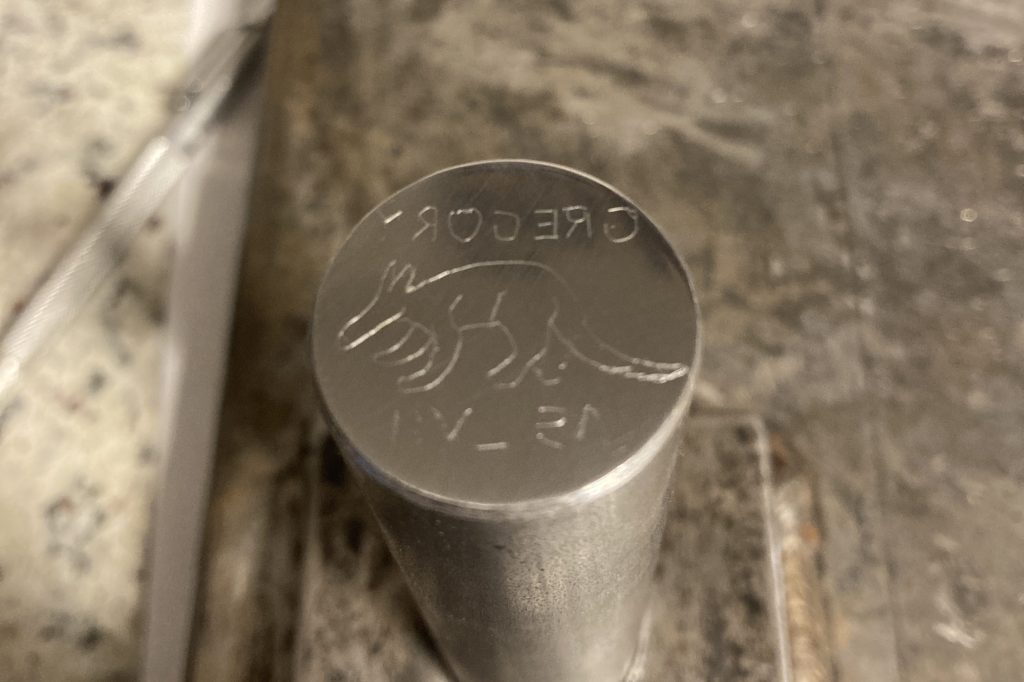
The designs were cut using a 3-step process using a combination of period and modern techniques. There was a lot of trial and error in developing this process, and unfortunately I was not taking pictures at each step.
- A thin channel was cut from the outline using an electric engraving tool
- The channel was deepened and cleaned up using a square hand-graver
- The lines were widened and cleaned up further using chasing punches.
- The animals were done with a thin round chasing punch, gently hammered around the perimeter (sort of like a round chisel).
- The letters were cleaned and deepened using the straight line and wide curve punches. To note, this is actually how the letters would have been done if the entire design had been chased from the start, engraving the letters first allowed for a solid resting place for the punches, allowing for a more precise strike.
- Small details (such as the lines on the feathers) were cut with the hand-graver.
At this point the designs were finished, but the surfaces of the dies were quite rough.
There had been a few errors that required the dies to be sanded down slightly during the process, so the dies were then re-polished for a clean finish.
After polishing, fine details (such as the lines on the feathers) were cut, and the dies were finished!