

Tools Required
- Metal cutting tool (ex. bolt cutters, angle grinder, Dremel with cutting wheels, hacksaw, chop saw)
- Metal grinding/shaping tool (ex. bench grinder, belt sander, hand files)
- Workshop torch (propane or Map-Pro)
- Tongs or pliers (something that can handle hot metal)
- Fire brick or anvil (heat-resistant surface)
Choosing Punch Material
Coin dies in the SCA are generally made from cold-rolled steel, and in order for your punches to impress an image on the die face, they must be made of hardened steel.
Not all types of steel are able to be hardened, it must be a high-carbon steel, so when shopping for punch stock be sure to keep a lookout for the keywords. Anything that is sold as “high-carbon steel” “hardened steel”, “spring steel”, or “tool steel” should be sufficient.
For the moneyer that is just starting out or working on a budget, your cheapest and most readily available sources of high-carbon steel (that won’t require too much reworking to make into punches) are:
- Concrete nails (you’ll need ones at least 2.5″ long)
- Old allen wrenches (check at pawn shops and thrift stores)
- Letter stamping sets for marking tools (HERE is one sold by Harbor Freight)
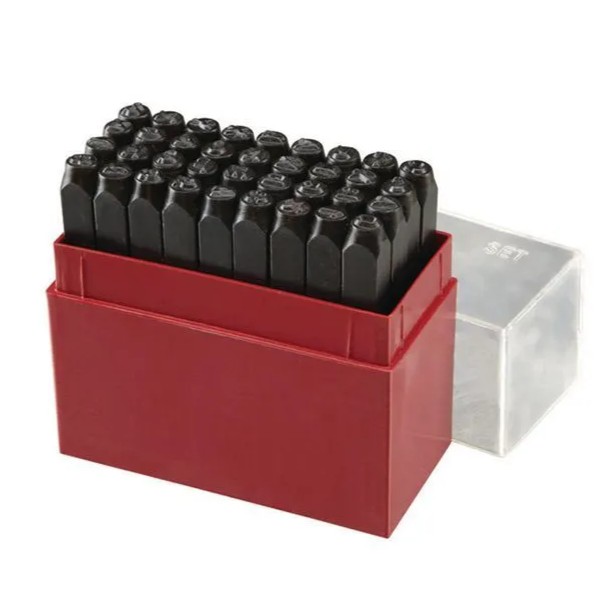
I personally recommend buying a box of concrete nails when you are first starting out, as there will be some trial and error. Once you have a handle on things, get yourself the letter stamping sets to use as your primary punches. They have a good diameter (which I go into the importance of shortly), are square cut so they won’t roll away, and fit neatly into the original storage case for easy organization.
As you start making more and more punches, especially branching out into specialty punches and very fine designs, you may find yourself wanting more control of the overall punch size, or needing to make a lot of punches and buying that many lettering sets to be impractical. If you reach that point, then I recommend using K&S metals heavy-gauge music wire. It is available in many diameters, and is a pretty good value (I can get 14 punches out of a 3 foot piece).
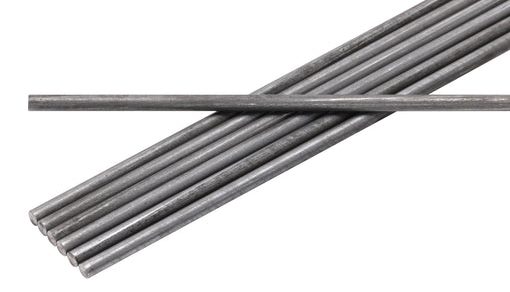
You can purchase bundles directly from K&S HERE, or individual lengths from Blick Art Supplies HERE. I recommend the #508 wire (5/32″) for your basic punches and any designs up to 3mm long, and #510 wire (7/32″) for full letters and any designs 3mm or longer.
Regardless of your steel source, the diameter of your punch stock should be at least 4mm at its thinnest point, though at least 6mm is preferred. Anything thinner than 4mm will have a tendency to crack or bend (depending on how thoroughly it was hardened) under regular use, and even 4mm will slowly deform over time. For punches that are expected to be used a lot, go with 6mm.
Parzival’s Pointers – Sizing Punch Stock to Designs
An important lesson I learned early in my A&S journey is that for any sort of impact-based impressioning, be it metal punches, coin dies, or leather stamps, the body of your punch/die/stamp should be at least 25% larger than the design itself.
The reasoning behind this is that the closer your design is in size to the size of the striking end, then the more accurate you need to be with each strike. If your hammer comes down at an angle or doesn’t hit the end directly on-center, it is likely you won’t get a clean impression. When the force of impact is directed into a smaller area, there is more leeway on the angle and precision of your strike before it becomes noticible.
I don’t understand the specific physics enough to explain in detail, but I can speak from experience. The one time I did a coin where the coins were the same diameter as the dies, maybe 1 in 5 of my strikes were clear enough to use.
In short, unless you can guarantee a perfectly centered and evenly distributed application of force (such as with a hydraulic press), look for punch stock that’s a little larger than the actual designs you want to be punching.
Shaping Punch Blanks
Once your metal has been chosen, it needs to be made into the general shape of a punch (a “punch blank”) before you can start shaping a specific design.
Parzival’s Pointers – Punch Lengths
When cutting punch stock, I recommend aiming for a final punch length of 2″-2.5″. A general rule of thumb is the larger your hands, the longer your punch needs to be in order to comfortably control it.
It is generally agreed among the master moneyers I’ve spoken with that anything less than 2″ is too short to be practical. Your fingers will be crowded around the length of the punch, and possibly obscuring your view of the working surface
You’ll want to find a sweet spot of length in which you can comfortably and firmly support the punch, without your fingers obscuring the surface of the coin die when you are lining it up to strike.
If you are cutting your punch stock from longer lengths of metal, start by cutting pieces of material between 2.5″-2.75″ (I recommend you cut it a bit longer than needed, as it will be ground down during shaping). This can be done with a pair of bolt cutters (I’ve cut 5mm music wire this way), or a hacksaw (if you have the patience). Rotary cutting tools such as an angle grinder, Dremel, or chop saw will also work.
Next, the general punch shape is made using the following steps. I personally do the bulk of the shaping on a bench grinder, then finish it on a belt sander, but any sort of grinding tools should work. (See note below if using hand files)
1. Grind/file down any cut marks, irregularities, metal burrs, etc. on the ends of the punch, making each end flat and level.
- If using nails, cut or grind off the tip of the nail
- If using premade lettering punches, grind off the existing design
2. Taper one end of the punch until the tip’s diameter is at least 25% less than the body’s.
- The taper should be at least 45 degrees
- The steeper the taper, the better. It makes for significantly less work when shaping the punch head, and gives an easier view of the punch tip when cutting your coin dies.
NOTE: Fully abrasive methods, such as grinders, sanders, and even diamond files, can be used before the punch blanks are annealed. However, if you are limited to metal hand-files, you will want to anneal your stock BEFORE you shape it, otherwise you risk ruining the file’s cutting surface.
Annealing
The final step before carving can begin is to anneal the punch blanks. Annealing is the act of heating up a metal to the point where it loses its hardness. Without this step, if your metal was already hardened you will be unable to shape it with files or gravers, and will likely ruin your tools if you try.
To anneal a punch, heat the tip with a torch till it is at least glowing red, then place it on a heat sinking or heat-resistant surface, such as an anvil or a fire brick (respectively). Allow the punch to air-cool completely.
NOTE: A regular brick or a stone countertop is NOT a viable surface for allowing the metal to cool. The heat is strong enough that it can cause the stone to chip and crack.
Once the blank is completely cooled, it is ready to start carving!
Tools Required (IP)
- Benchtop vice (ball vice is preferred)
- __
- Needle files
- Sandpaper
Punch Shapes (IP)
Basic Lettering Punches
___These shapes are:

Pellet Punch
Carving from a Matrix
When getting into carving more advanced punch shapes, the usage of a matrix can be a tremendous boon. In short, a matrix is a thick piece of metal that had a design(s) struck or engraved onto its surface, which was then hardened. An annealed punch blank can then be struck with a hammer over one of the impressed designs, which will leave a slight raised design on the surface of the punch.
The design is not clear enough to use as a punch on its own, but it serves as an outline you can follow when cutting your design, rather than having to cut it completely freehand and hope it turns out the way you like.
I am lucky enough to own one of the matrixes tooled off of the punches of Master Ian Cnulle. Similar types of stamping matrices exist, but these are generally considered to be the gold standard by most of the moneying laurels and professionals that I know.
To get an impression from a matrix, take a prepared punch blank and position the end to be carved over the desired design, as close to centered as possible. Holding the blank upright, give the end a single solid strike with a 1-2 lb. hammer.
Once the image is impressed, the process for carving is identical to a freehand carving, filing/graving away material until the outline is exposed.
If the impression wasn’t clear or only partially shows, don’t worry! Once you get part of the design carved out, you can touch-up the impression with another strike. After you have at least one edge of the design carved out (cut all the way to the outline), try lining it back up with the impression on the matrix. If the outline is clean, you will feel the cut area can “slot” into place on the matrix. If you are able to do so
Parzival’s Pointers – Avoiding Punch Shifting
If you are ever doing a matrix strike on an already cut punch, whether to enhance the outline or as a final clean-up, you MUST keep it as still and steady as possible. If the punch shifts at ALL when you move to strike it, the design will likely be messed up and you’ll have to either make corrections or start the whole punch over.
The most common cause of this is a flinching reflex that happens when you bring down the hammer to strike the punch and your fingers tense up. I will not lie, it takes a lot of time and practice to get past this reflex, and primarily just comes with experience.
Another common cause of shifting is when the punch is not The best advice I can give to minimize the risk of shifting
Intermediate Punch Carving Techniques
Internal Edges and Corners
Many of the more complicated punch designs, particularly letters, have especially tight corners and inside edges that are difficult to remove by conventional means. My recommended technique for addressing these is:
- Cut in as close as you can (without crossing the outline) with a round or knife-edge file (fine-toothed, if possible)
- Using a round or knife-edge hand graver, gently carve out the material while cutting parallel to the outline’s edge
Parzival’s Pointers
Some tips for cutting out these inside/corner, born from a lot of trial and error.
- You don’t need to make a super deep cut in these areas (it is extremely difficult to do so with hand tools in the first place). While the outside areas of the punch should fully taper out into the body, the internal areas only need to be as deep as the punch impression will be (about 1/2 mm). Any areas outside the
- When using a graver on steel at such a small scale, it is better to chip away at the bits of metal you are trying to remove, rather than making full-length cuts. Angle your graver high to dig into the metal slightly, then bring the angle down until you can chip out a fleck of metal. Repeat, moving down the length of the edge.
- When cutting any sort of corner, cut from inside the corner moving out. That way if your graver slips, there’s less risk of overcutting and damaging the design.
Making Punches with Punches (IP)
Hardening the punch is the most essential part of the process, as it prevents the punches from deforming and makes them give a clear impression when carving a coin die. It is also the most dangerous part of the process, dealing with open heat sources, red hot metal, and the potential for flying shards of metal due to thermal stress. ____
Tools Needed
- Metal tongs/pliers
- Safety glasses
- Heat-resistant work gloves
- Heat-resistant surface (such as a fire brick)
- Propane/MAP torch (or any other directional heat source that can reach 1,700 F)
- Quenching liquid (oil or water, depending on steel type)
- Wide-mouthed metal or glass container
Parzival’s Pointers
If you are having trouble getting the punch hot enough from the torch alone, try placing it up against a few fire bricks when heating it (see below). Heat that would otherwise be lost to the air is instead absorbed by the bricks, which is reflected back onto the punch.

